Wednesday, August 3, 2011

marshmallow fondant


i love making this stuff. it easy to do and tastes much better than regular fondant. most recipes make a larger batch. i don't like having that much fondant around, unless i'm making a bigger cake. i'll just end up eating it. so for my make shift recipe...

5 oz of mini marshmallows (about half a package)
1T water
1/2 lb powdered sugar
butter
put marshmallows and water in a microwavable bowl and microwave for about 90 seconds. stir the mixture every 30 seconds. once mixture is completely combined add powdered sugar. stir until combined... it'll be sticky and messy. butter up a clean counter and sprinkle some powdered sugar on top. put marshmallow mixture on the prepared counter and knead. oh and be sure to butter up your hands. otherwise you'll end up having marshmallow covered hands. add more powdered sugar as needed. the mixture should be firm and pliable. don't add too much powdered sugar or the fondant will break apart and be really dry. you want the fondant to be similar to the texture of play dough. once desired texture is achieved roll fondant into a ball and coat the outside with a little butter. wrap in plastic wrap and let sit on the counter for at least 30 minutes. then you're ready to decorate. be careful when adding colors. the more color you add the fondant starts falling apart. so try not to add too much food coloring. have fun decorating!

Thursday, June 30, 2011

my favorite white bread... for now.

aaahhhh, can i tell you how much i love the smell of bread baking? it's one of the most comforting smells in the world. and today i thought i'd share my love of bread. as my mother always told me... making bread is done by feel more than by a recipe. so this is my attempt to let you know how i make bread. this is one of my favorite ways to make bread because it's simple and i almost always have all the ingredients. and to be honest i add and subtract ingredients all the time. it all depends on what i have on hand, how i want the bread to taste, and how long i want the bread to last. today i did a simple white bread. so here we go...


2 cups of warm water (the hottest your tap water will get usually works great)
1/2 cup sugar (i like mine sweet, but you can go more or less depending on your desires)
1/4 cup butter
1 1/2 T yeast (i buy my yeast in the vacuum packed package, if you buy the packets it's 2 packets)
flour (as much as you need, i honestly don't measure)
1 - 2 t salt (once again, depends on what you like)
vegetable oil


so i put the water, sugar, butter and yeast all in a bowl and let it sit until the yeast develops (till it gets all foamy) then add salt and enough flour to make a loose sticky dough. put a handful of flour on your clean counter top, then pour the loose dough out onto the flour and begin kneading. add flour as needed until you get desired consistency (if the dough sticks to the counter, add a little more flour. if it gets stiff and won't fold into itself anymore... you've added too much flour. so it's a happy medium. heavy, but not stiff. sticky, but not so sticky you can't work with it. it truly takes practice to understand the consistency. i'm still working on it.) (btw you can always try using a bread maker... i prefer kneading by hand because you can feel the consistency rather than trying to guess if it's right.) once desired consistency is met, pour a little oil in your original bowl and place dough on top. then flip the dough. make sure dough is coated on all sides. this prevents the dough from drying out while rising. cover the bowl with a clean kitchen towel. let dough rise until doubled in size. depending on the room temperature, this could take 30 min to 2 hours. (sometimes i let the dough rise longer, depending on if my kids need to be feed or bathed or chased down... you know the usual chaos that is motherhood.) then the aroma begins to develop in the house... i love this. once the dough has reached the desired size, dump it out on the clean counter top, separate dough into 2 equal pieces. then flatten  each into a large rectangular shape. fold into thirds and then again into thirds in the opposite direction. then place into 2 greased loaf pans. place clean kitchen towel over both pans and let dough rise until double in size. place in 400F oven for about 20 min. remove bread from pans and place on rack in oven for additional 10 min with the oven off. and wha la, your house if filled with the most comforting smell on earth. and the best part is you get to eat it! just try not to eat a whole loaf in one sitting. then again that's why i make two, so my husband doesn't know ;)

Wednesday, June 22, 2011

yummy jerky

1.5 lbs roast thinly sliced
1 T garlic powder
1 T onion powder
1 T cracked black pepper
1 T brown sugar
2 T soy sauce
1 T lemon juice

combine all the ingredients. place in dehydrator for... well for as long as you like. we like ours extra dry, almost crispy. enjoy!

Sunday, June 19, 2011

chris' favorite chocolate chip cookies

1 cup butter
1 cup brown sugar
3/4 cup sugar
1 T vanilla
2 eggs
3 cups flour
3/4 t baking soda
3/4 t salt
2 cups chocolate chips (chris prefers butterscotch chips)

combine butter, brown sugar, and sugar. beat until well combined (aprox 2 min.) add vanilla and eggs. beat for another 2 min. put flour, baking soda and salt on top of butter mixture, then beat all together until just mixed. stir in chocolate chips. bake at 350F for 10-12 min. 10 if you like them soft. 12 if you like them crunchy. enjoy!

Thursday, June 16, 2011

pizza pizza pizza!!!


  • 1 (14.5 ounce) can diced tomatoes
  • teaspoon oregano
  • 1 teaspoon marjoram
  • 1 teaspoon basil
  • 1 teaspoon garlic powder
  • 1/2 teaspoon salt

1/3 cups warm water

  • 1 cup warmed milk
  • 1/2 teaspoon salt
  • cups flour
  • tablespoon sugar
  • 1 tablespoon yeast
  • tablespoons vegetable oil
  • mozzarella cheese
  • whatever toppings you like

sauce: combine diced tomatoes, oregano, marjoram, basil, garlic powder, salt in a blender. pulse for about 30 seconds or until desired consistency (i prefer mine pretty thin.)

dough: combine water, milk, sugar. sprinkle yeast on top. let sit for about 10 minutes. after yeast gets all foamy, add 3 1/2 cups flour, salt and 2 tablespoons of vegetable oil. stir till combined, then let the dough rest for 10 minutes. spread out the remaining flour on clean surface (i use my counter. my mom likes to use a canvas cloth on the counter. it's totally whatever you're comfortable using.) scoop out the dough onto the floured surface and knead for about ten minutes... or until desired consistency (yes i use that phrase a lot, but truly it's not a "time thing", it's a "when it feels right thing.") you may need to add more flour if the dough is too sticky. after kneading, place dough in an oiled (vegetable oiled) bowl and cover for about an hour, or until dough has doubled in size. take dough out of bowl and knead for a few more minutes. place dough back in the oiled bowl, cover and place in refrigerator for 4-8 hours. if the dough starts to overflow out of the bowl, just push it down. take out of the refrigerator about 30 minutes prior to using.

pizza: heat oven to 475 F. flour your clean surface and roll out the dough to fit into a half sheet pan (approx. 18"x9".) pour remaining 3 tablespoons oil in half sheet pan, then spread around to cover the surface and edges. place rolled out dough into pan. pour sauce onto rolled out dough. i only use about half the sauce, but you can use more. it all depends on what you like. add mozzarella and other toppings (once again as much as you like.)  place pizza in oven for approx. 25 min, or until cheese is bubbly and browning. enjoy!

new posts

a friend of mine and i were talking about how i haven't posted anything recently. she mentioned that i should post some of the food i've been making for regular meals and such. i thought hey why not. it looks good and tastes good. it may not be difficult to make. but gosh darn it, it tastes good. so that's what i'm gonna do. i'll still do posts about difficult food to make. but why not share the everyday goodness with everyone. i may even throw in the not so good stuff, just so you know the good from the bad... or at least my take on it. thanks for checking up on me.

Monday, April 18, 2011

macarons #3 finally got it!

i know i'm a bit behind in my posts, but i have a good excuse. we moved :) i'm loving our new home and we're fairly settled. so here we go again...

after a great deal of trial and error, i finally got it right! the problem was measuring the egg whites prior to drying. be sure to have 1/4 cup plus 2 tablespoons after you let the egg whites sit out... but to be honest i don't even let them sit out. i separate my eggs and use them right away. also reduce the temp to 300F. i don't always sift my powder sugar either. so the long awaited macarons are done! now on to the next project.

Tuesday, March 8, 2011

macarons #2

almost there. i put 3 egg whites and dropped the temp to 300 F.
then i had left over cream cheese frosting, from making home made oreos.
so not quite there yet, close though. and they sure taste good. i'm thinking a little less egg whites now. oh and parchment paper is a must. the temp change worked better this time. so try try try again. btw i can't stop eating these... they're almost gone and i just finished making them an hour ago!

Thursday, March 3, 2011

macaron

1 1/4 cups powder sugar
1 cup almond flour (finely ground blanched almonds)
1/4 cup plus 2 tablespoons egg whites
pinch of salt
1/4 cup sugar

ok, so not the easiest dessert to make... i've been trying to get these right for over six months at least 5 or 6 different occasions. and once again they didn't quite work out. but i think i finally made a breakthrough. next week i'll be making them again... and this time they should be perfect. i hope. oh and we'll get into the filling next week too. it's usually a butter cream or ganache or jam... pretty much anything yummy between two cookies.

i decided to try making different flavors...
finely ground pistachios 
finely ground almonds
finely ground macadamia nuts
put the egg whites in a bowl and let sit at room temperature for at least 8 hours... i let mine sit out 24 hours. i got busy, so i couldn't get to them till the next day.
combine powder sugar and almonds. i've heard some people say to sift together. but you need to have the right size sieve and i'm lazy. so i combine mine throughly and be sure there aren't any lumps. 
nice and mixed. set aside.
beat the egg whites till foamy. i like to beat till soft peaks form... but it's really up to you, it works both ways. i've done it both ways. just till foamy means it'll take longer to beat.
add sugar and beat some more...
till it's pretty and shiny with stiff peaks.
then combine the powder sugar/almond mixture... i added a little pink food coloring so i could differentiate between the different nuts. plus it makes it pretty.
combine until the mixture flows and peaks disappear. this is where i thought i went wrong... but what i really think it is, is i didn't have quite enough egg whites and i mixed too much.
i use a piping bag with a size 12 tip.
fill the bag with the beautiful mixture.
and start piping onto parchment paper. i've used wax paper, and it does work, but not quite as well. don't make them any larger than about an inch... yet again another thing i keep doing wrong. if you make them too big, they stay kinda flat.
these are the macadamia nut ones.
and these are the pistachio ones... yes i added food coloring to these too. otherwise they look like bird poo.
now let them dry for a couple hours. just until a skin forms and the batter is matte instead of shiny. btw the batter should have a smooth surface not the spiral that mine does.
heat the oven to 325 F. then cook the macarons for about 11 min. be sure to put a spoon or something in the door, keeping it slightly open during the cooking. some people like to rotate half way through too... not me, i'm lazy.
and the disaster is revealed. as i said, i think i know all the steps i went wrong. and i'm going to try again next week.
these ones were a little better, but still not great.
and these were the closest i could get... they all still tasted great. just not so pretty and not quite the right texture. wish me luck next week and if you have any advise, please help!... i've got to get these right someday.

Tuesday, February 22, 2011

kouing aman

1 tablespoon yeast
1 1/2 cups warm water
3-4 cups flour
1 1/2 teaspoon sea salt
1 cup sugar (aprox.)
1/2 cup butter (plus additional for coating pans)

and so we begin with the ever enticing kouing aman. i've never been able to say it right. thank goodness i only  have to spell it. this wonderfully crunchy, salty, sweet pastry is the perfect treat for breakfast. admittedly i'd never had kouing aman, i'd never even heard of it until i saw it on tv. it looked so good i had to try it. so i made it at home with very little success, then i went to a somewhat local bakery and had it there... i was in heaven! so with my new found knowledge on how kouing aman is suppose to look and taste, here we go again...

let's begin with the dough.
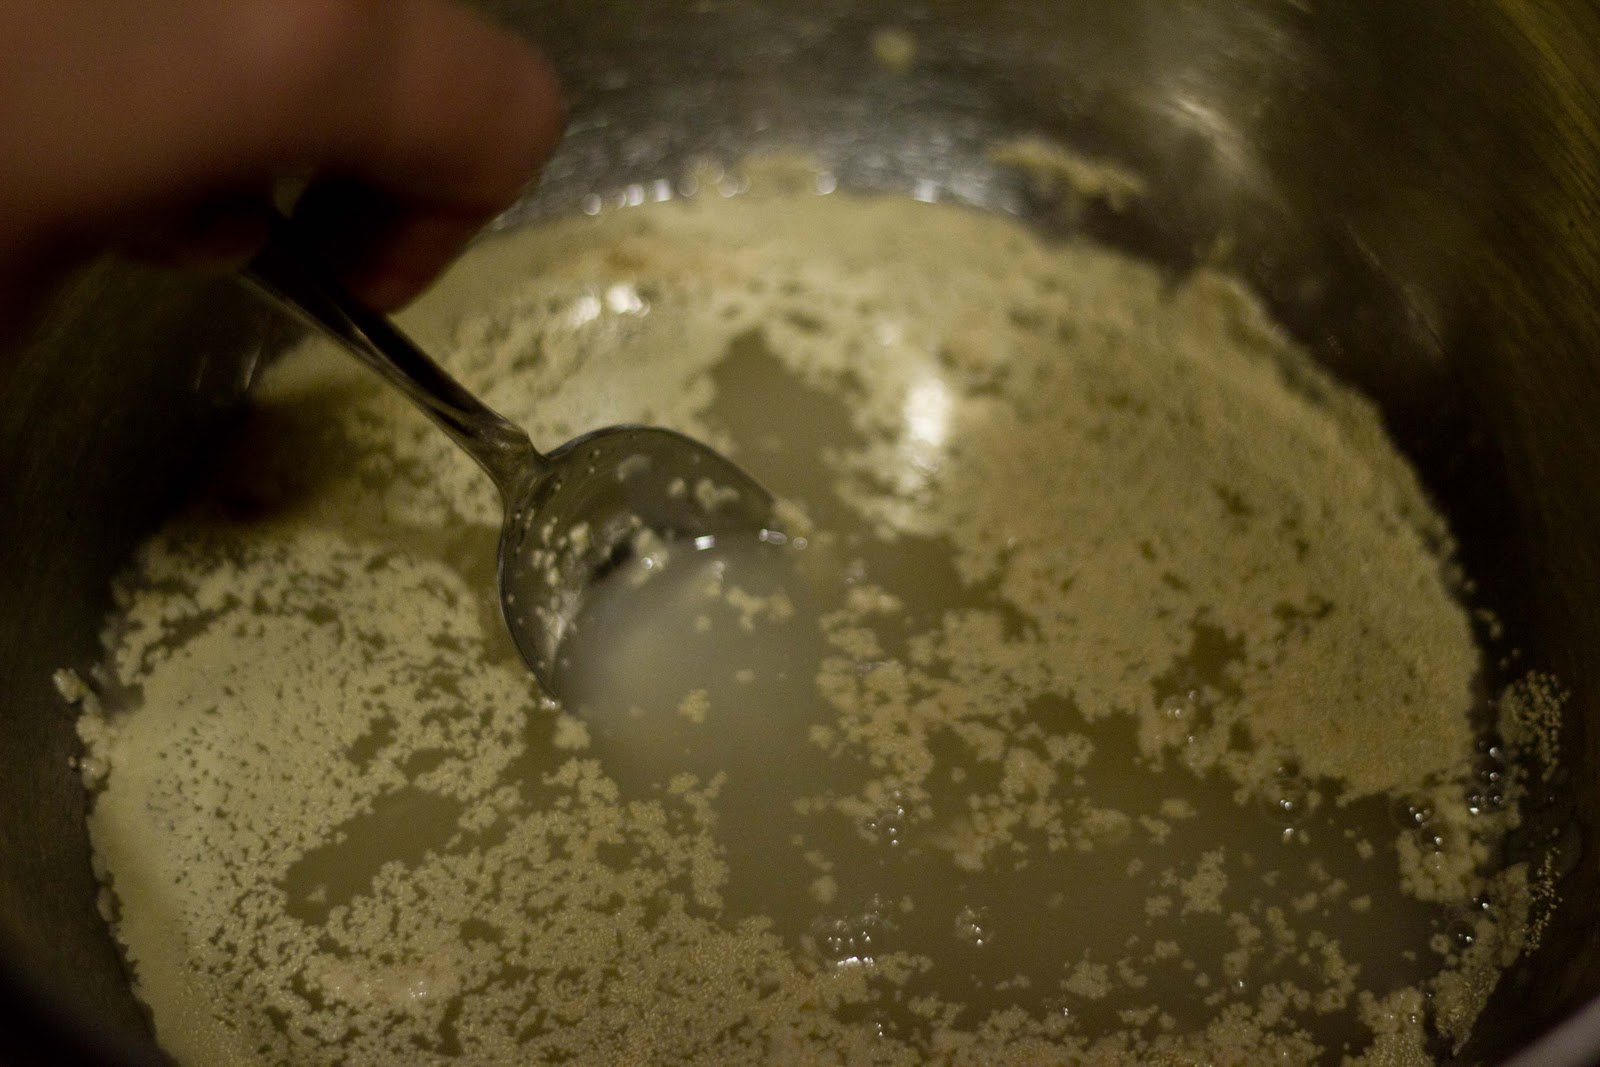
 add yeast to water (add a little sugar to ensure foaming.)
 lightly stir, but don't soak.
 while yeast is developing, i get my butter ready. first i put it between some plastic wrap, then get a rolling pin and smash away. this is a little easier if you let the butter sit at room temperature for about 30 min. but you can do it right out of the fridge. 
 roll it flat... about an 1/8 inch... or so, i'm not sure i didn't measure.
 it should look about like this. mine's not perfect, but it doesn't need to be. once it's flat, put it in the fridge. we'll get back to it later i promise.
 look! the yeast is all bubbly now.
 and so we add the flour. i never add the entire amount on the recipe. usually a 1/2 cup short, and add more as needed. any type of bread dough is temperamental if you add too much flour. and remember, you can always add more, but you can't take away.
 stir it all together
 until you get a loose ball. you want the dough to be sticky.
 then pour the dough onto a floured surface.
knead for about... oh i don't know, until it's done. to be honest the best way for me to describe the texture of kneaded dough is.... wait for it.... breast tissue. i know i said it. but it's true. so moving on.
 i told you the dough was sticky.
 once you're done kneading
 put some melted butter in the original bowl. no you don't need a clean one. why make more of a mess than you already are.
 put the dough in and flip it upside down. be sure to coat all of the dough.
 i cover mine with plastic wrap, but you can use a clean kitchen towel. it's personal preference. 
 oops... i forgot to add the sea salt. i hope adding it late is ok. i just sprinkled it on top. i'll knead it in later. let dough rise for 60 min (or until doubled in size.)
clean up your counter while your dough is rising. you don't want those crusty bits left on the counter in your dough later.
the dough has doubled
place on floured surface
nice and sticky
knead the salt in... normally you won't have to do this, because you would have added the salt in with the flour. but i forgot so i'm kneading it in now and...
letting the dough rise one more time for 30 min.
looks like it turned out pretty good.
roll out into a rectangle. about 15 x 11 in.
get the flattened cold butter out of the fridge and place in the middle of the dough.
sprinkle sugar over the butter.
fold dough over butter and sugar.
like an envelope.
sprinkle more sugar over the top.
fold in thirds again.
wrap in plastic wrap and place in fridge for about 60 min.
 once it's nice and cold place on sugar coated counter top. dust the top with sugar, so the rolling pin doesn't stick to the dough. roll out into a rectangular shape.
 sprinkle with sugar.
 i like to add a little more sea salt. not too much though. you want sweet and salty, not salt and yuck.
 cut into 9 pieces. i like to use a pizza cutter.
 squish each square and place in buttered muffin pan sections. be sure to butter the sections throughout the inside and on top. the sugar gets pretty sticky in the oven. preheat oven to 425 F.
then it's time to cook. make sure to put a pan or foil under the muffin pan. and wait...
 ta dah! 35 min later, golden brown and delicious. time may vary. just make sure they're golden before you take them out of the oven.
 wait a few minutes, then take out of the pan and place on a cooling rack. careful when you take them out, they're HOT. and if that sugar touches your fingers... well lets just say i've had many a blister to remind me to not do that again. so i use a fork to take them out.
 looking good...
yum yum that was good... ok ok, that was my second one :)